
You've seen how Kinetica enables generative AI to create working SQL queries from natural-language questions, using data set up for the demonstration by Kinetica engineers. What about your data? How can you make Kinetica respond to real SQL queries about data that belongs to you, that you work with today, using conversational, natural-language questions, right now?
You're about to see how Kinetica SQL-GPT enables you to have a conversation with your own data. Not ours, but yours. With the built-in SQL-GPT demos, the data is already imported, and the contexts that help make that data more associative with natural language, already entered. When your goal is to make your own data as responsive as the data in our SQL-GPT demos, there are steps you need to take first.
This page shows you how to do the following:
- Import your data
Load their contents into tables inside Kinetica -
Create contexts
These will provide the large language model (LLM) with the semantic information it needs to be able to reference the proper columns and fields in your tables -
Ask Questions
Questions are phrased the way you'd say these questions out loud, then run the generated queries on Kinetica to get instantaneous results
STEP 1: Import your Data into Kinetica
Kinetica recognizes data files stored in the following formats: delimited text files (CSV, TSV), Apache Parquet, shapefiles, JSON, and GeoJSON [Details]. For Kinetica to ingest this data from another database or from a spreadsheet, it should first be exported from that source into one of these formats.
With one or more importable data files at the ready, here's what you do:
-
Log into Kinetica Workbench. If you don't already have Kinetica setup, you can
Create a Kinetica Cloud Account Free:
-
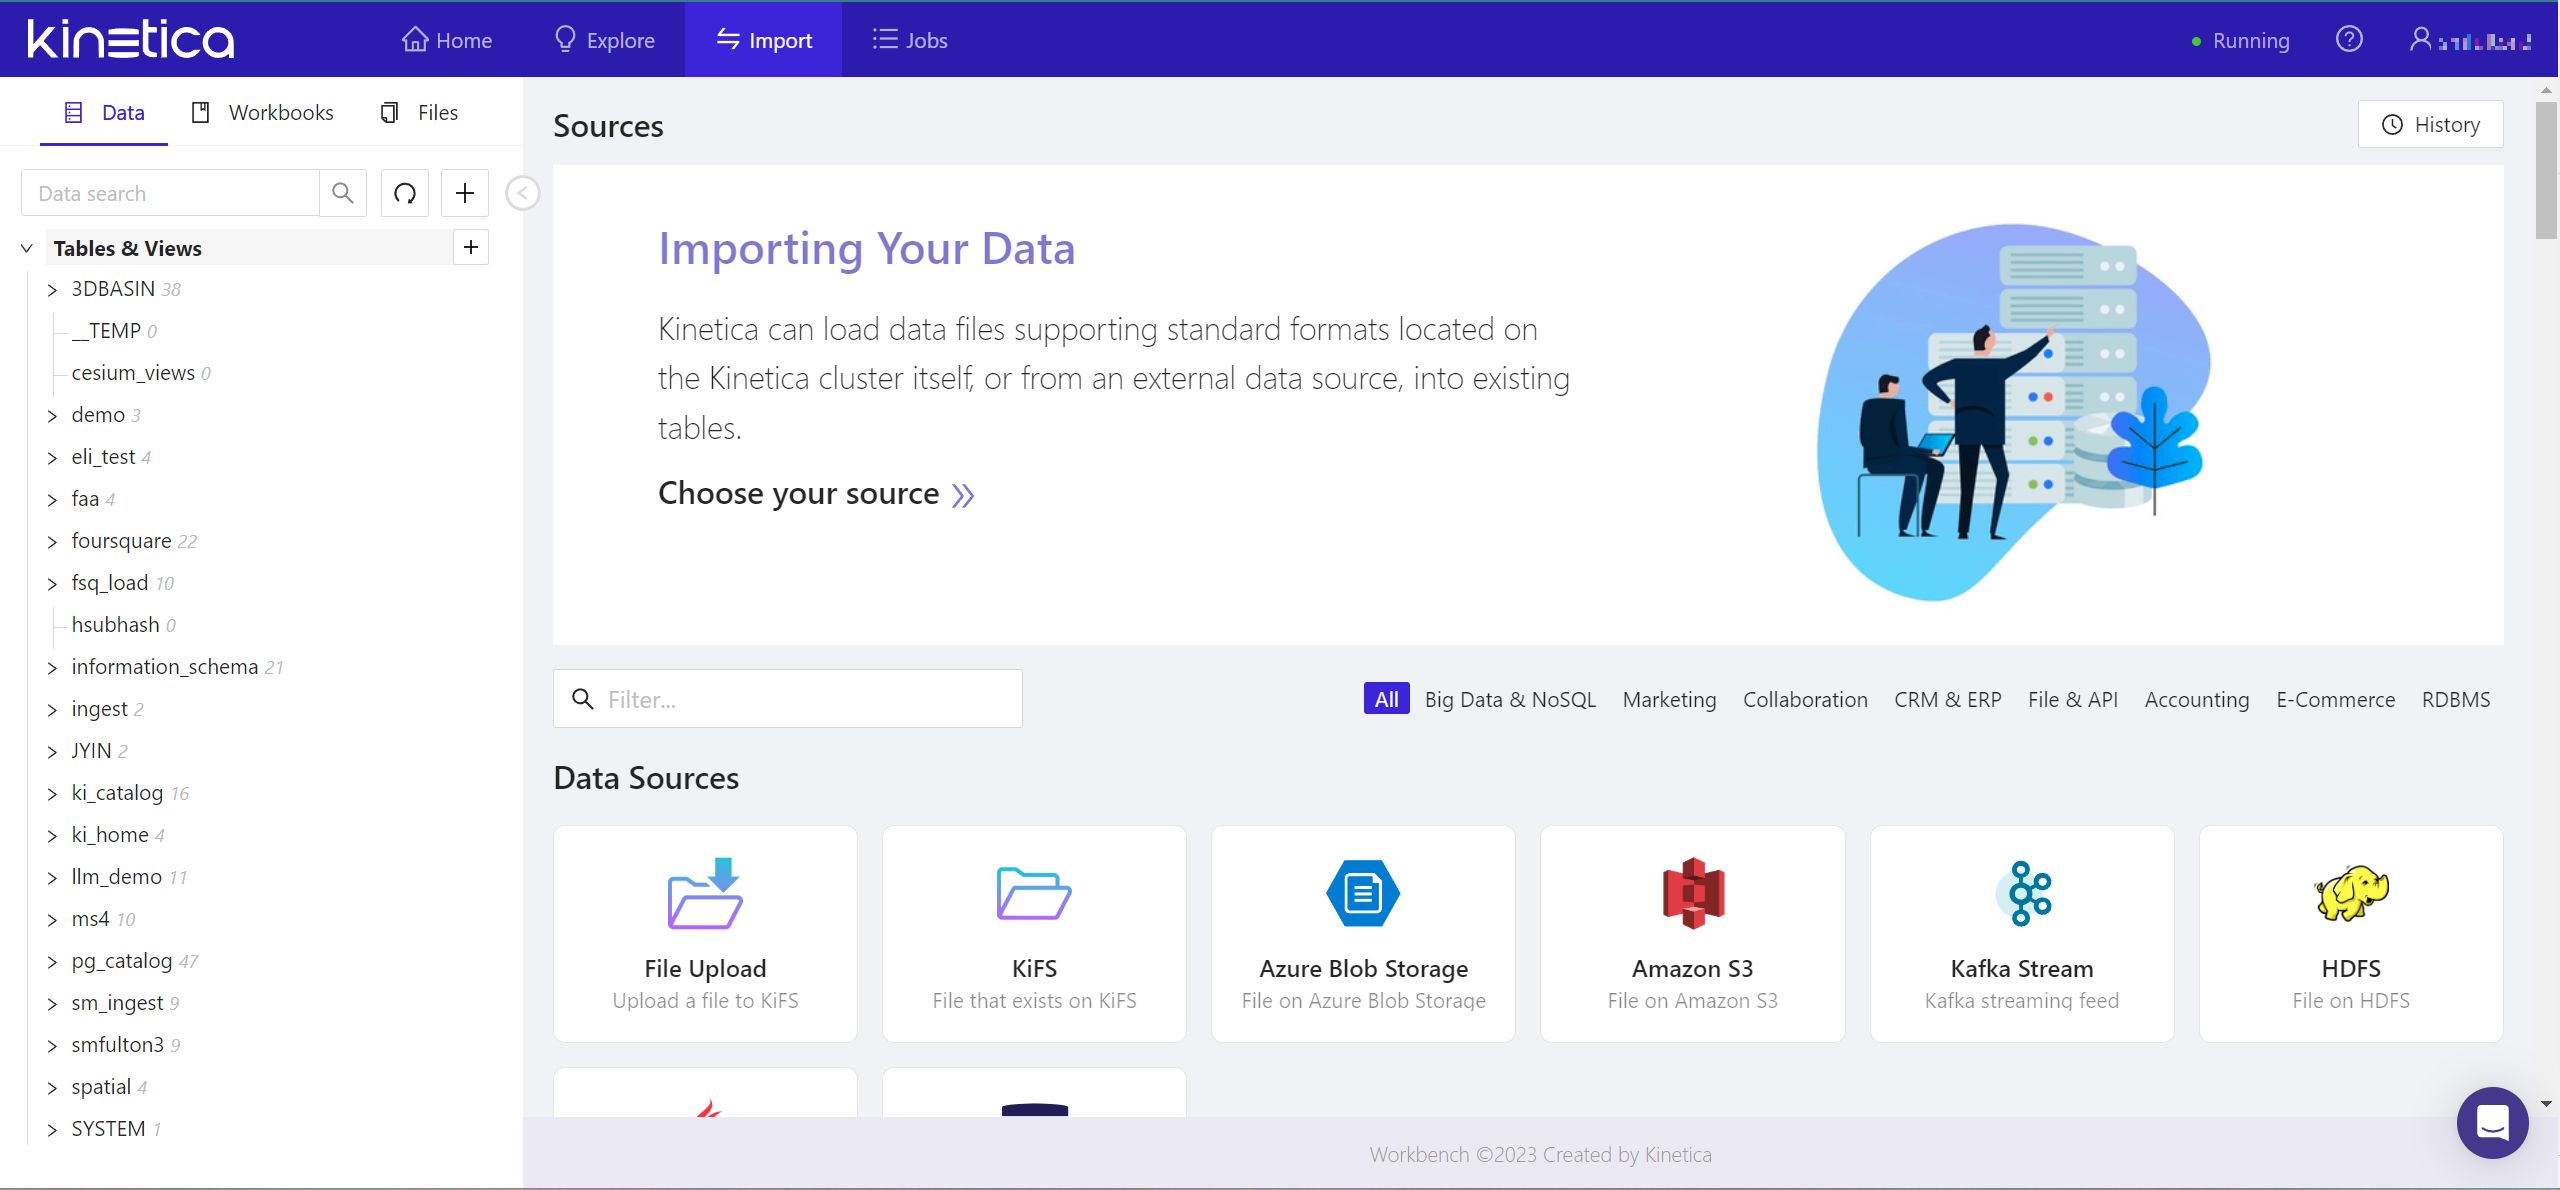
From the menu over the left-side pane, click the Files tab. Hover over the
+ button, and from the popup, select Add New Folder.

-
In the popup window, under Name, enter a unique name, then click
Create. The name you entered will soon appear in the
Folders list in the left-side pane, sorted in alphabetical order and preceded by a
tilde (~).
-
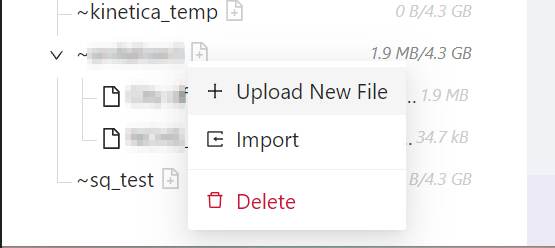
In the Folders list, locate and right-click the name of your new folder. From
the popup menu, select Upload New File. The
Upload File panel will appear.

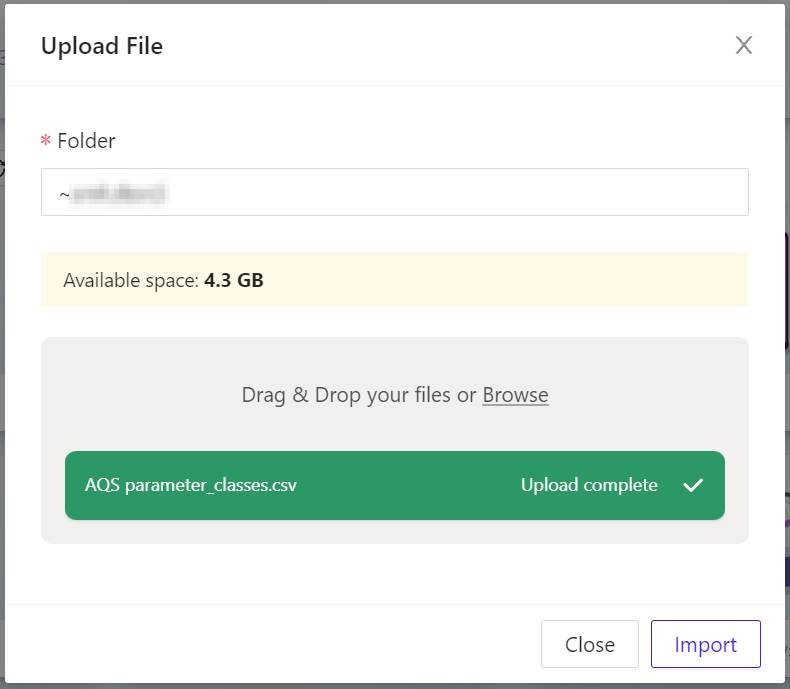
- From your computer's file system, choose the file or files you wish to upload into your new Kinetica folder, so that their data may be imported. The files you chose will be indicated in the grey box in the center of the Upload File panel.
-
Click Upload. Your data files will be uploaded into Kinetica, and this panel
will keep you apprised of their progress.
-
In a moment, all the grey progress report bars will turn green, indicating your files are
successfully uploaded. To proceed, click Import. The
Kinetica Filesystem Import panel will appear.
-
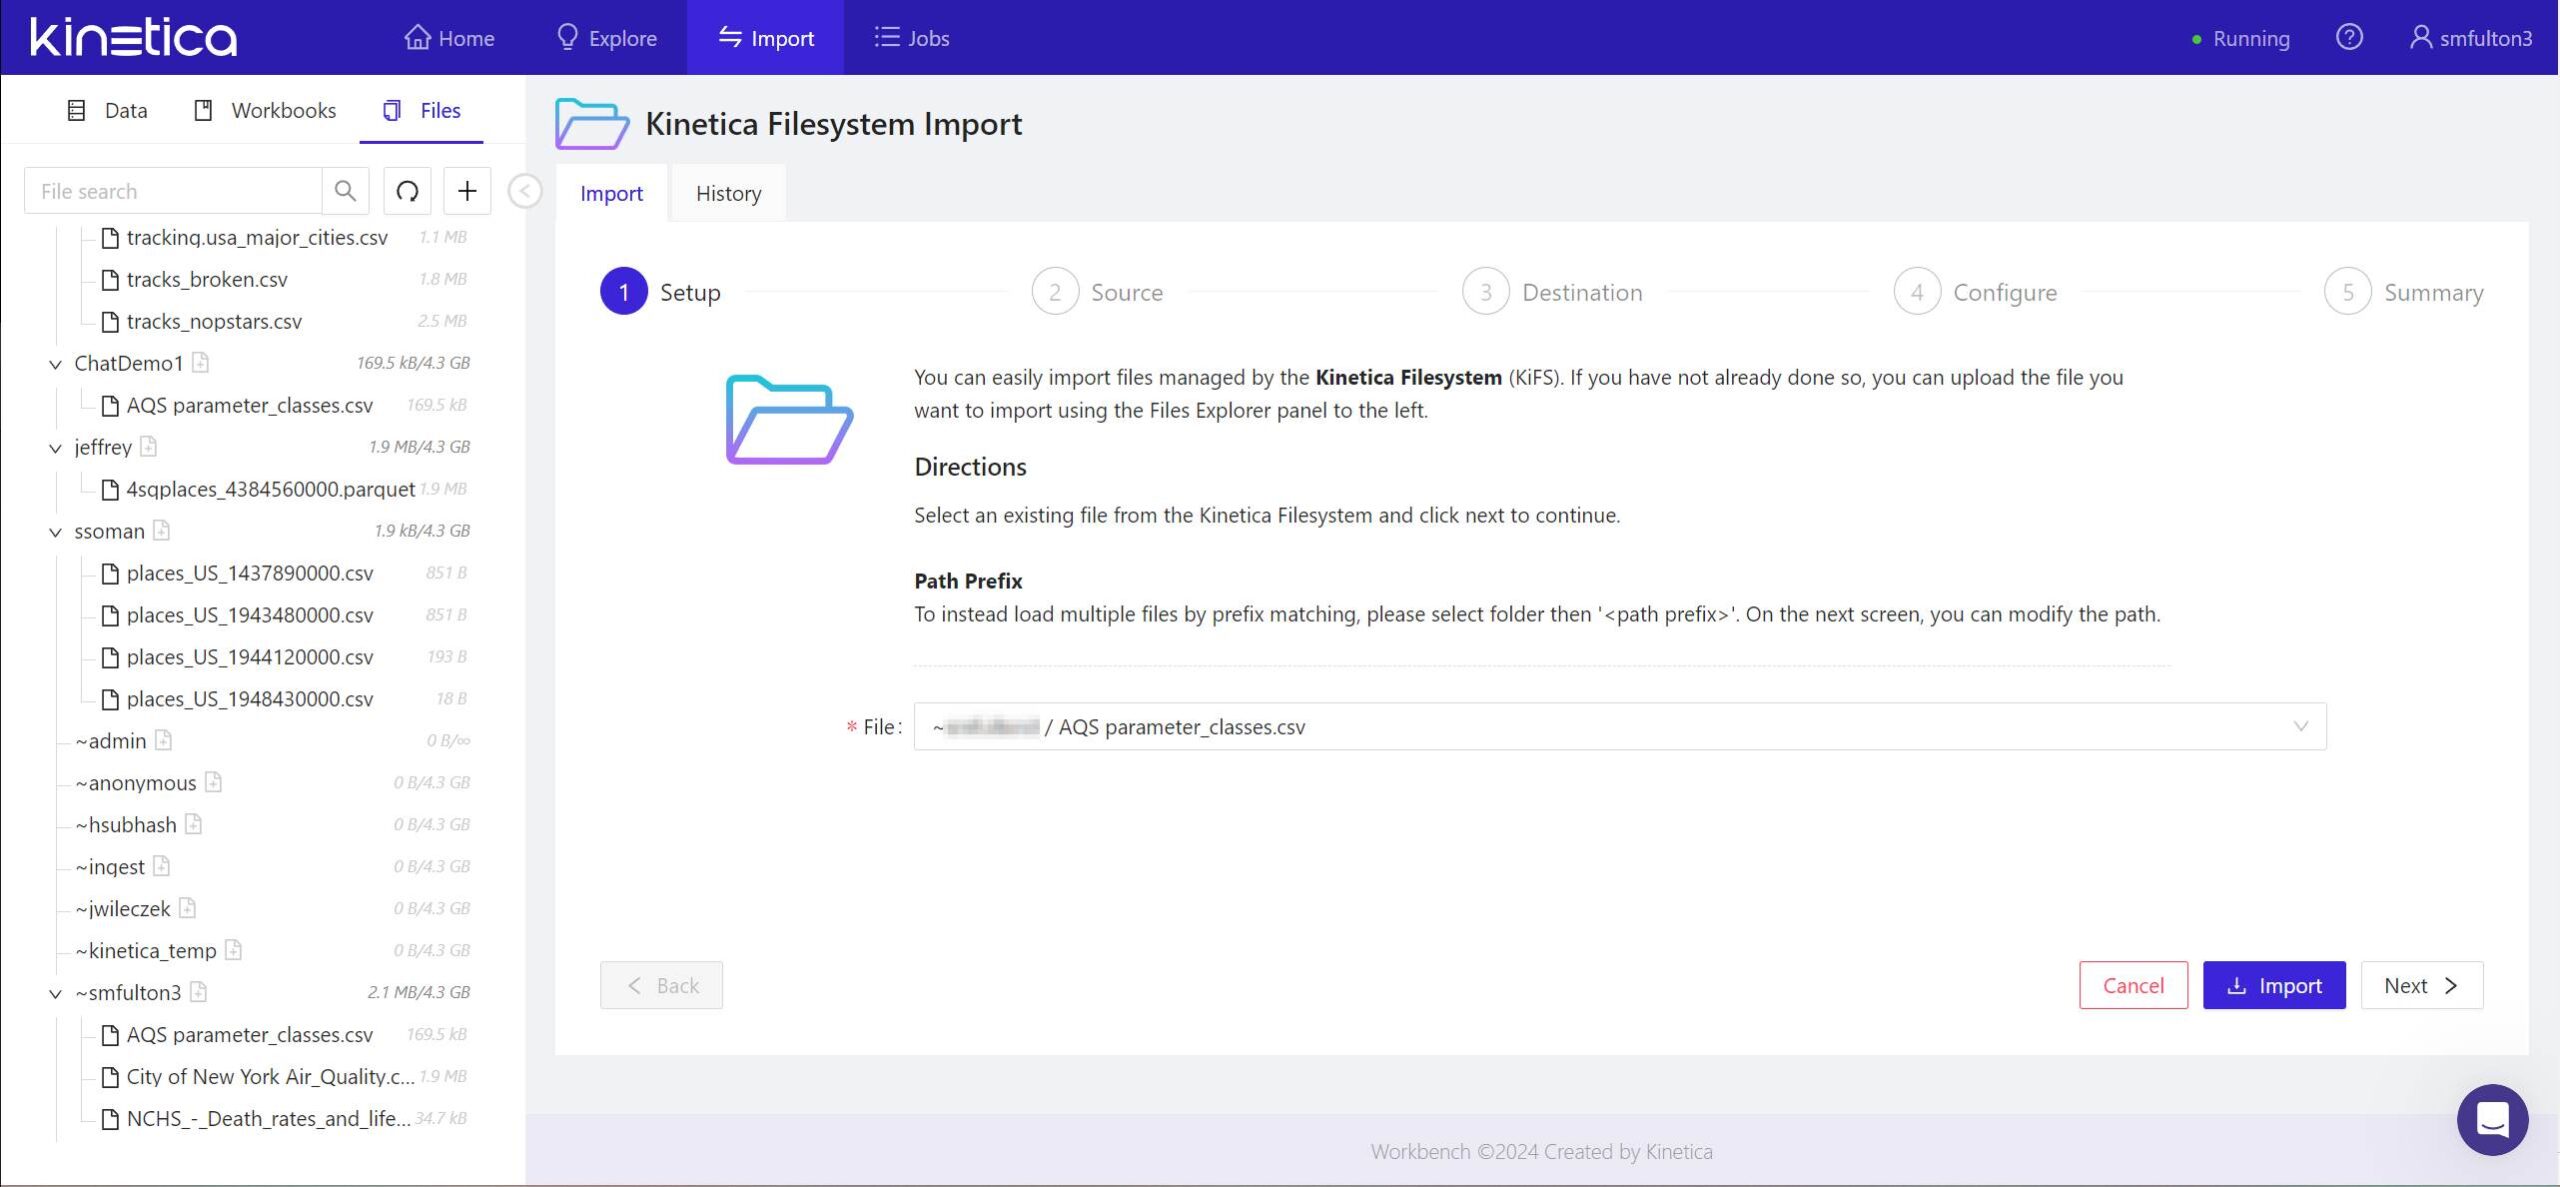
In the panel marked 1 Setup, the file or files you've chosen for import will
already have been entered. Click Next > to continue.
-
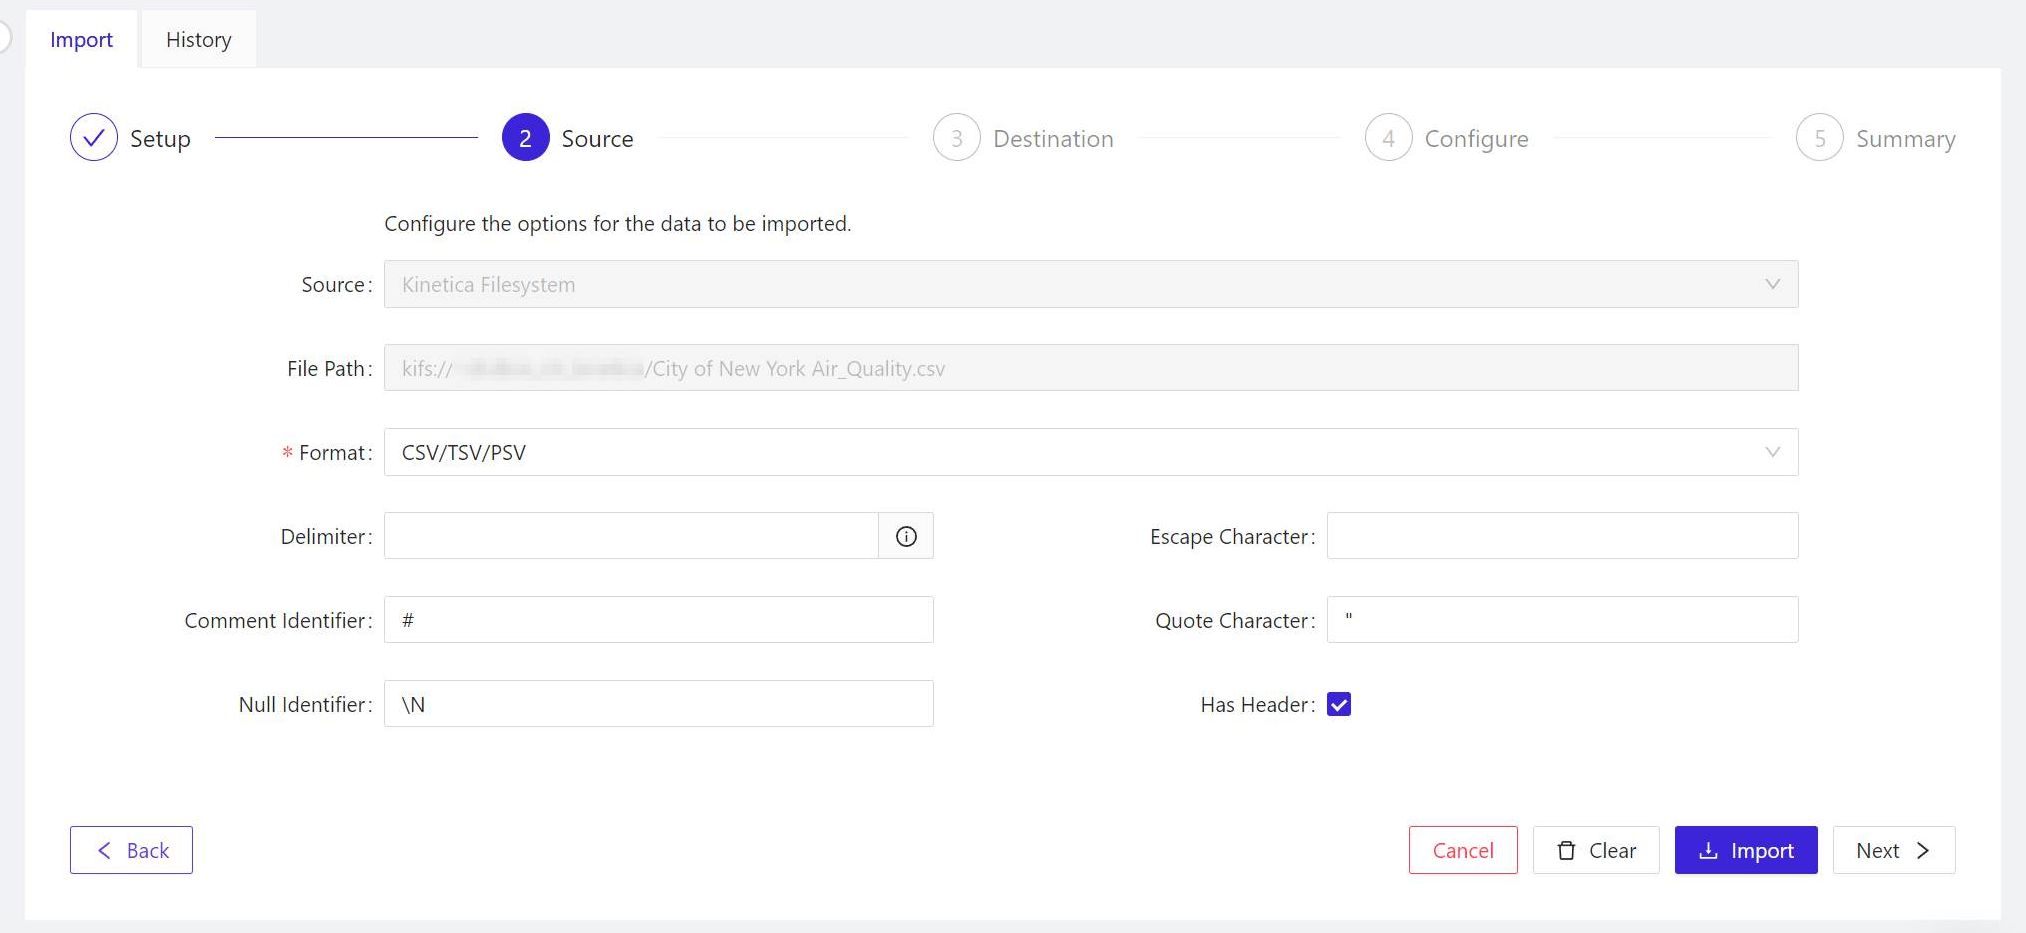
For the panel marked 2 Source, Kinetica will have inferred which format your data
is in already. If the event it makes an inaccurate assumption, in the
Format field, choose the format for your imported data from the list. When
all the options for this panel look correct, click Next > to continue.
-
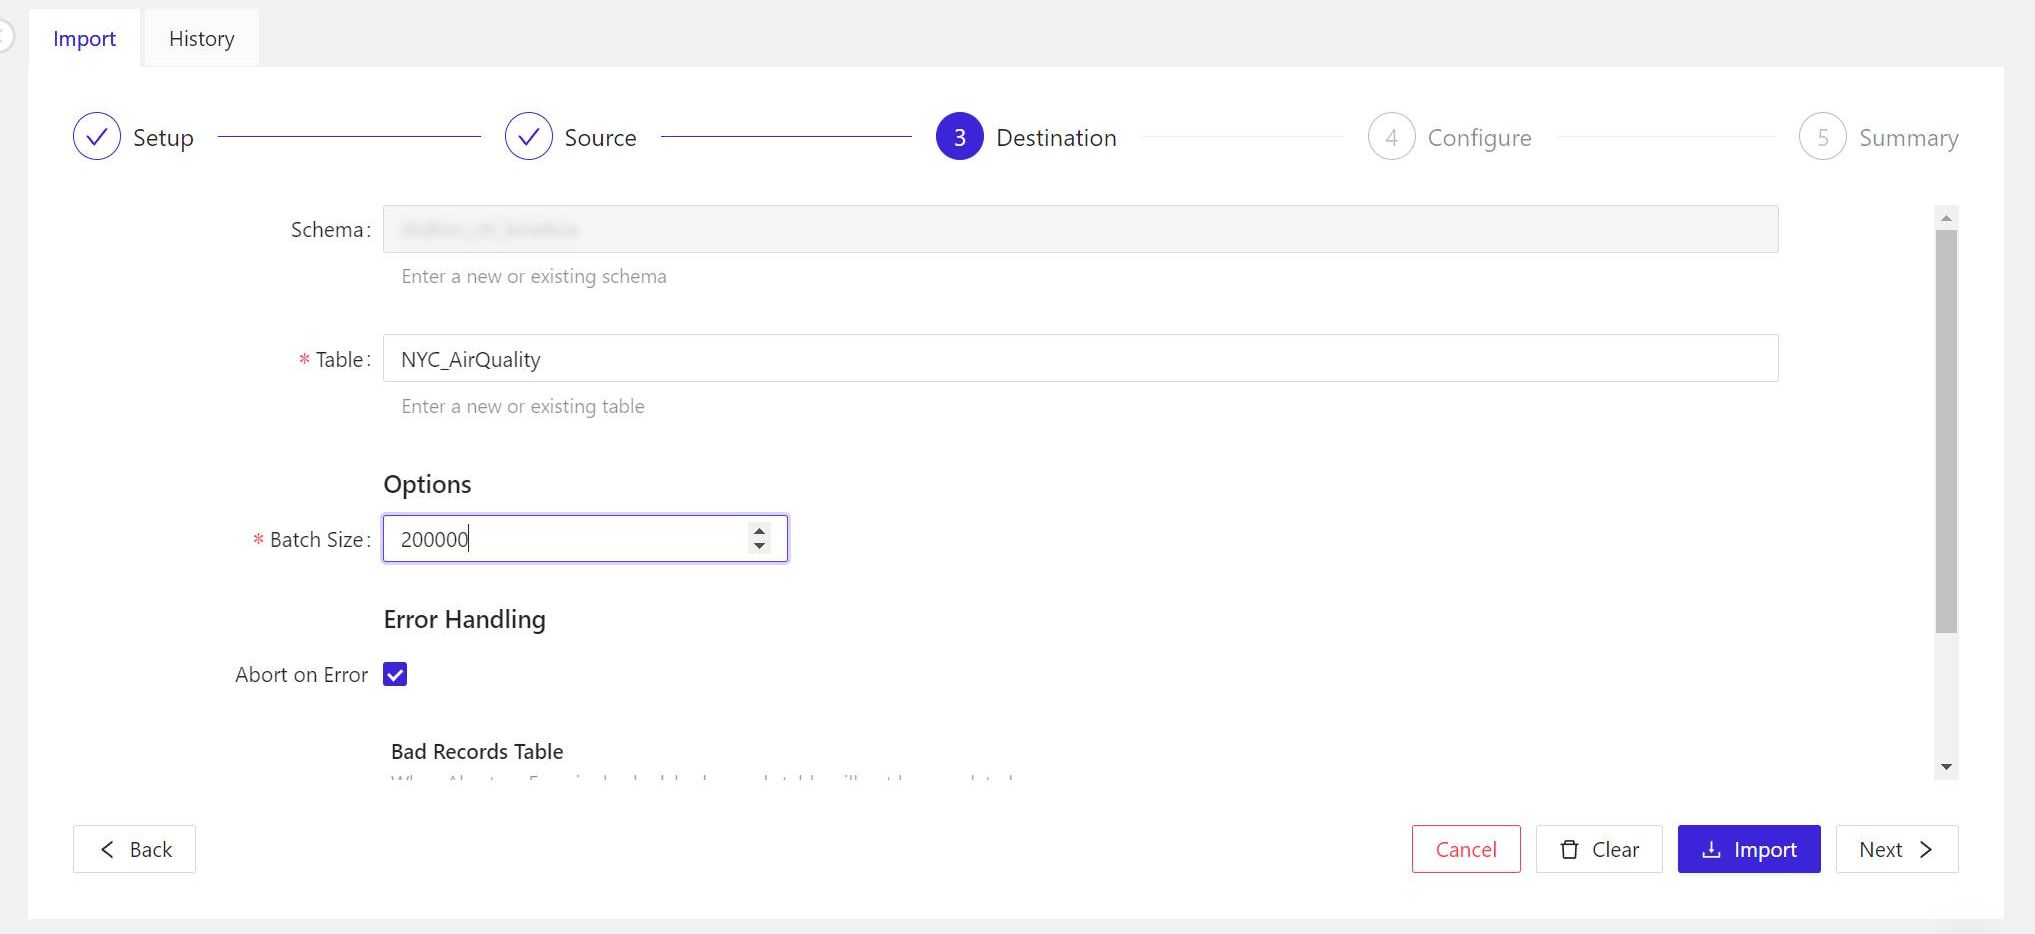
In the panel marked 3 Destination, if you're operating on the free tier, your
edition of Kinetica will only have one schema, whose name will appear in the
Schema field. By default, the name to be applied to the table is the current
name of the data file (if you changed that name in step 4, your chosen name will appear here).
When the options here are set, click Next > to continue.
-
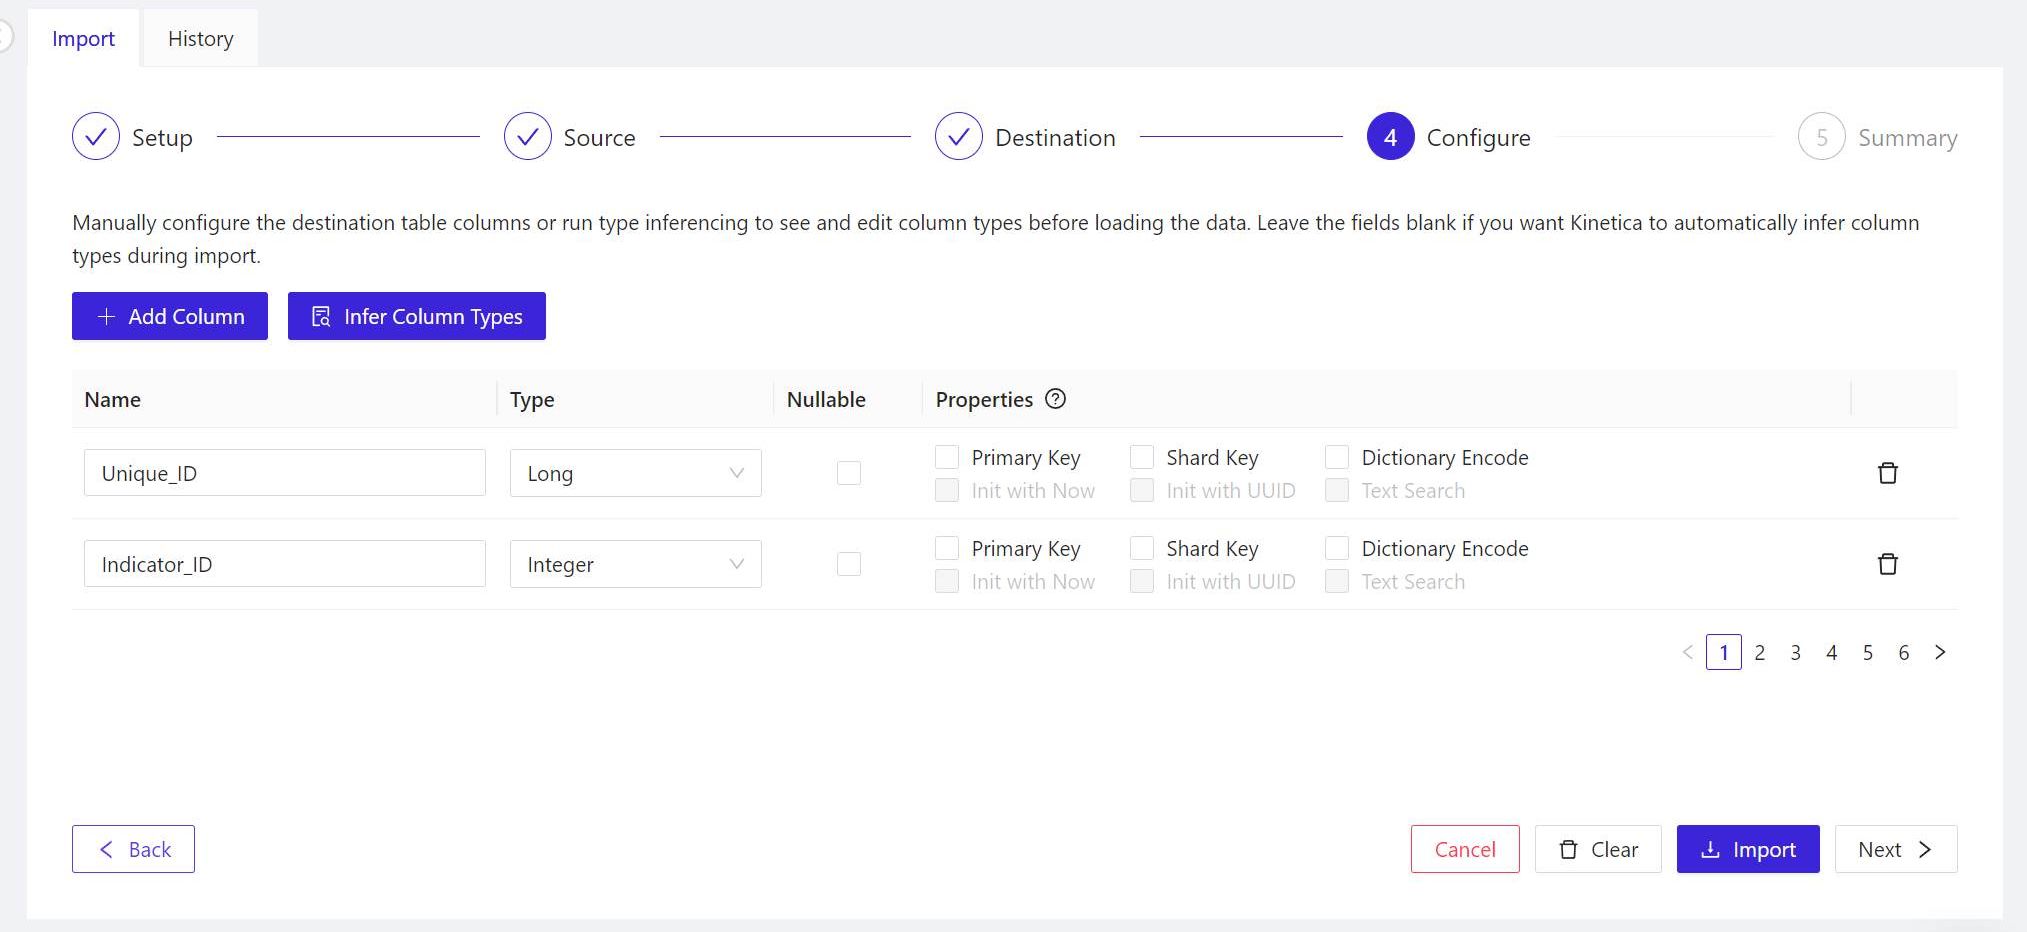
For the panel marked 4 Configure, Workbench is usually capable of inferring the
proper field names and content types (for example, short integer values versus floating-point
values) from properly formatted, existing tables. So you may skip the manual inference step,
and click Next > to continue.
-
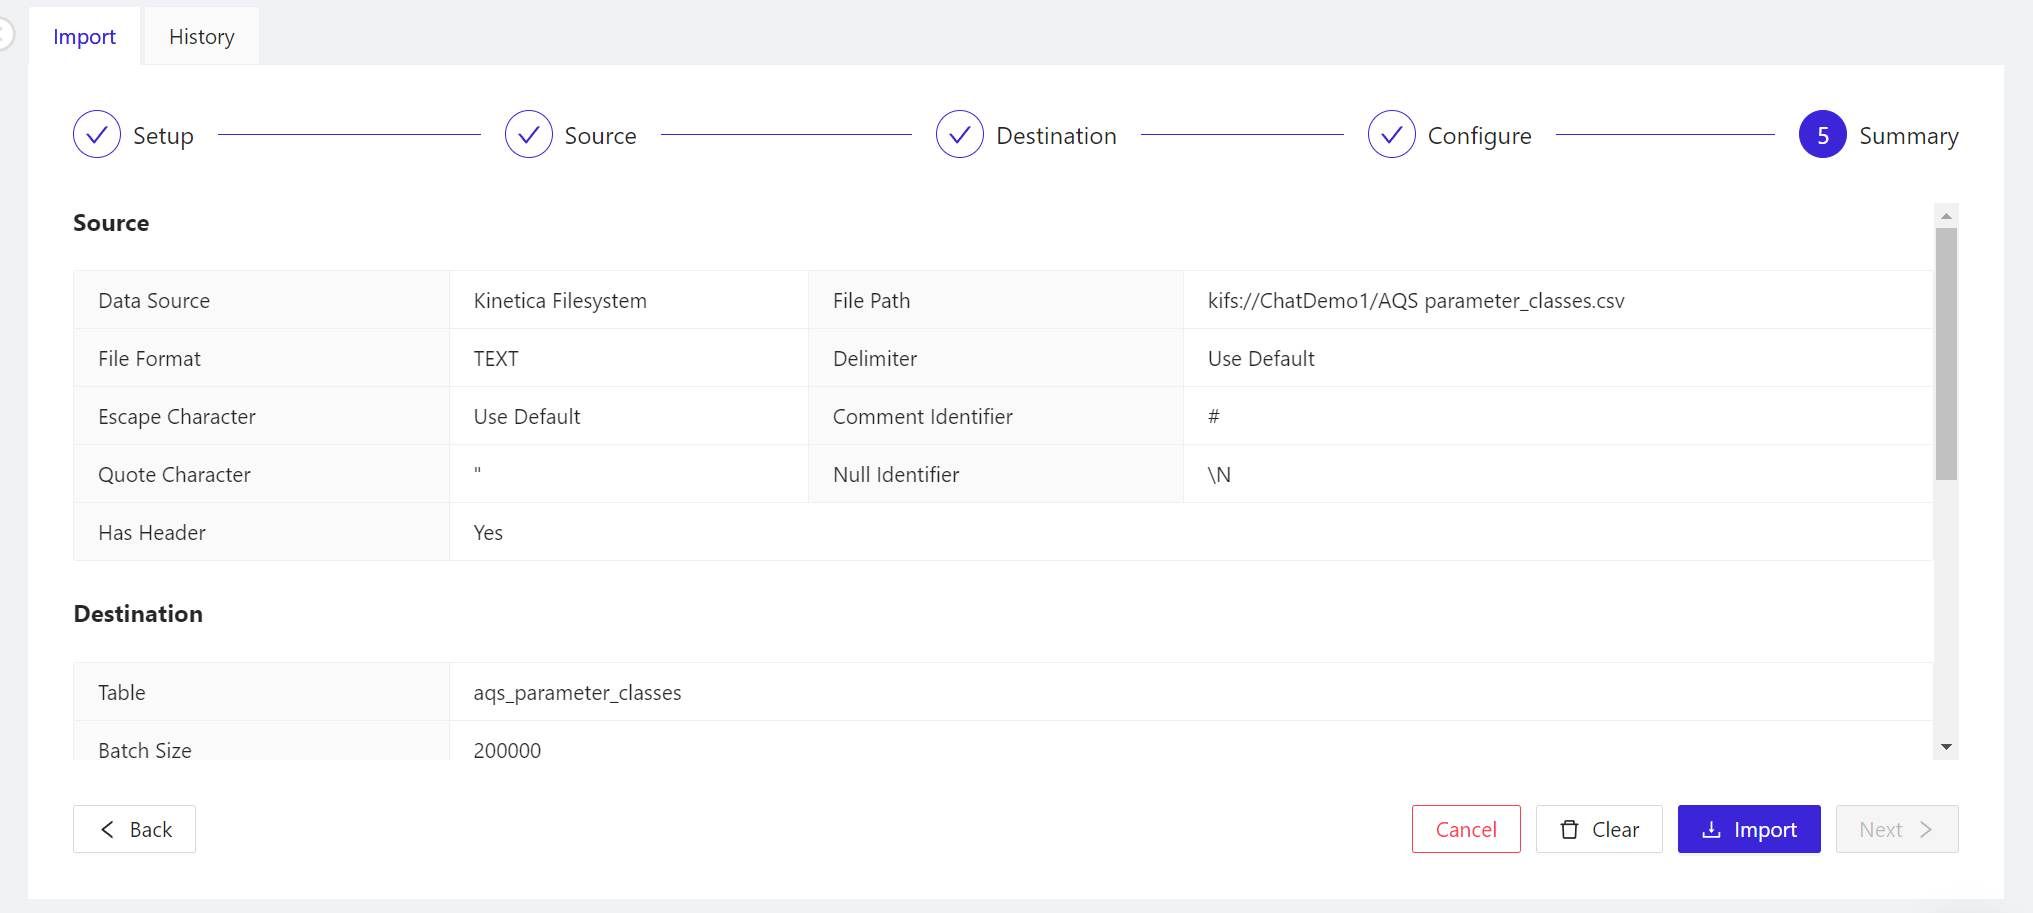
The 5 Summary panel explains in detail what Kinetica is about to do with the data
you're asking Workbench to import. First, it reviews the options you've chosen. Scroll
down to find the CREATE TABLE statement that Kinetica will use to generate the table for the schema,
followed by the LOAD DATA INTO statement that will populate the new table with data from the
file. There's nothing more to import here, so when you're ready to start importing, click
Import.
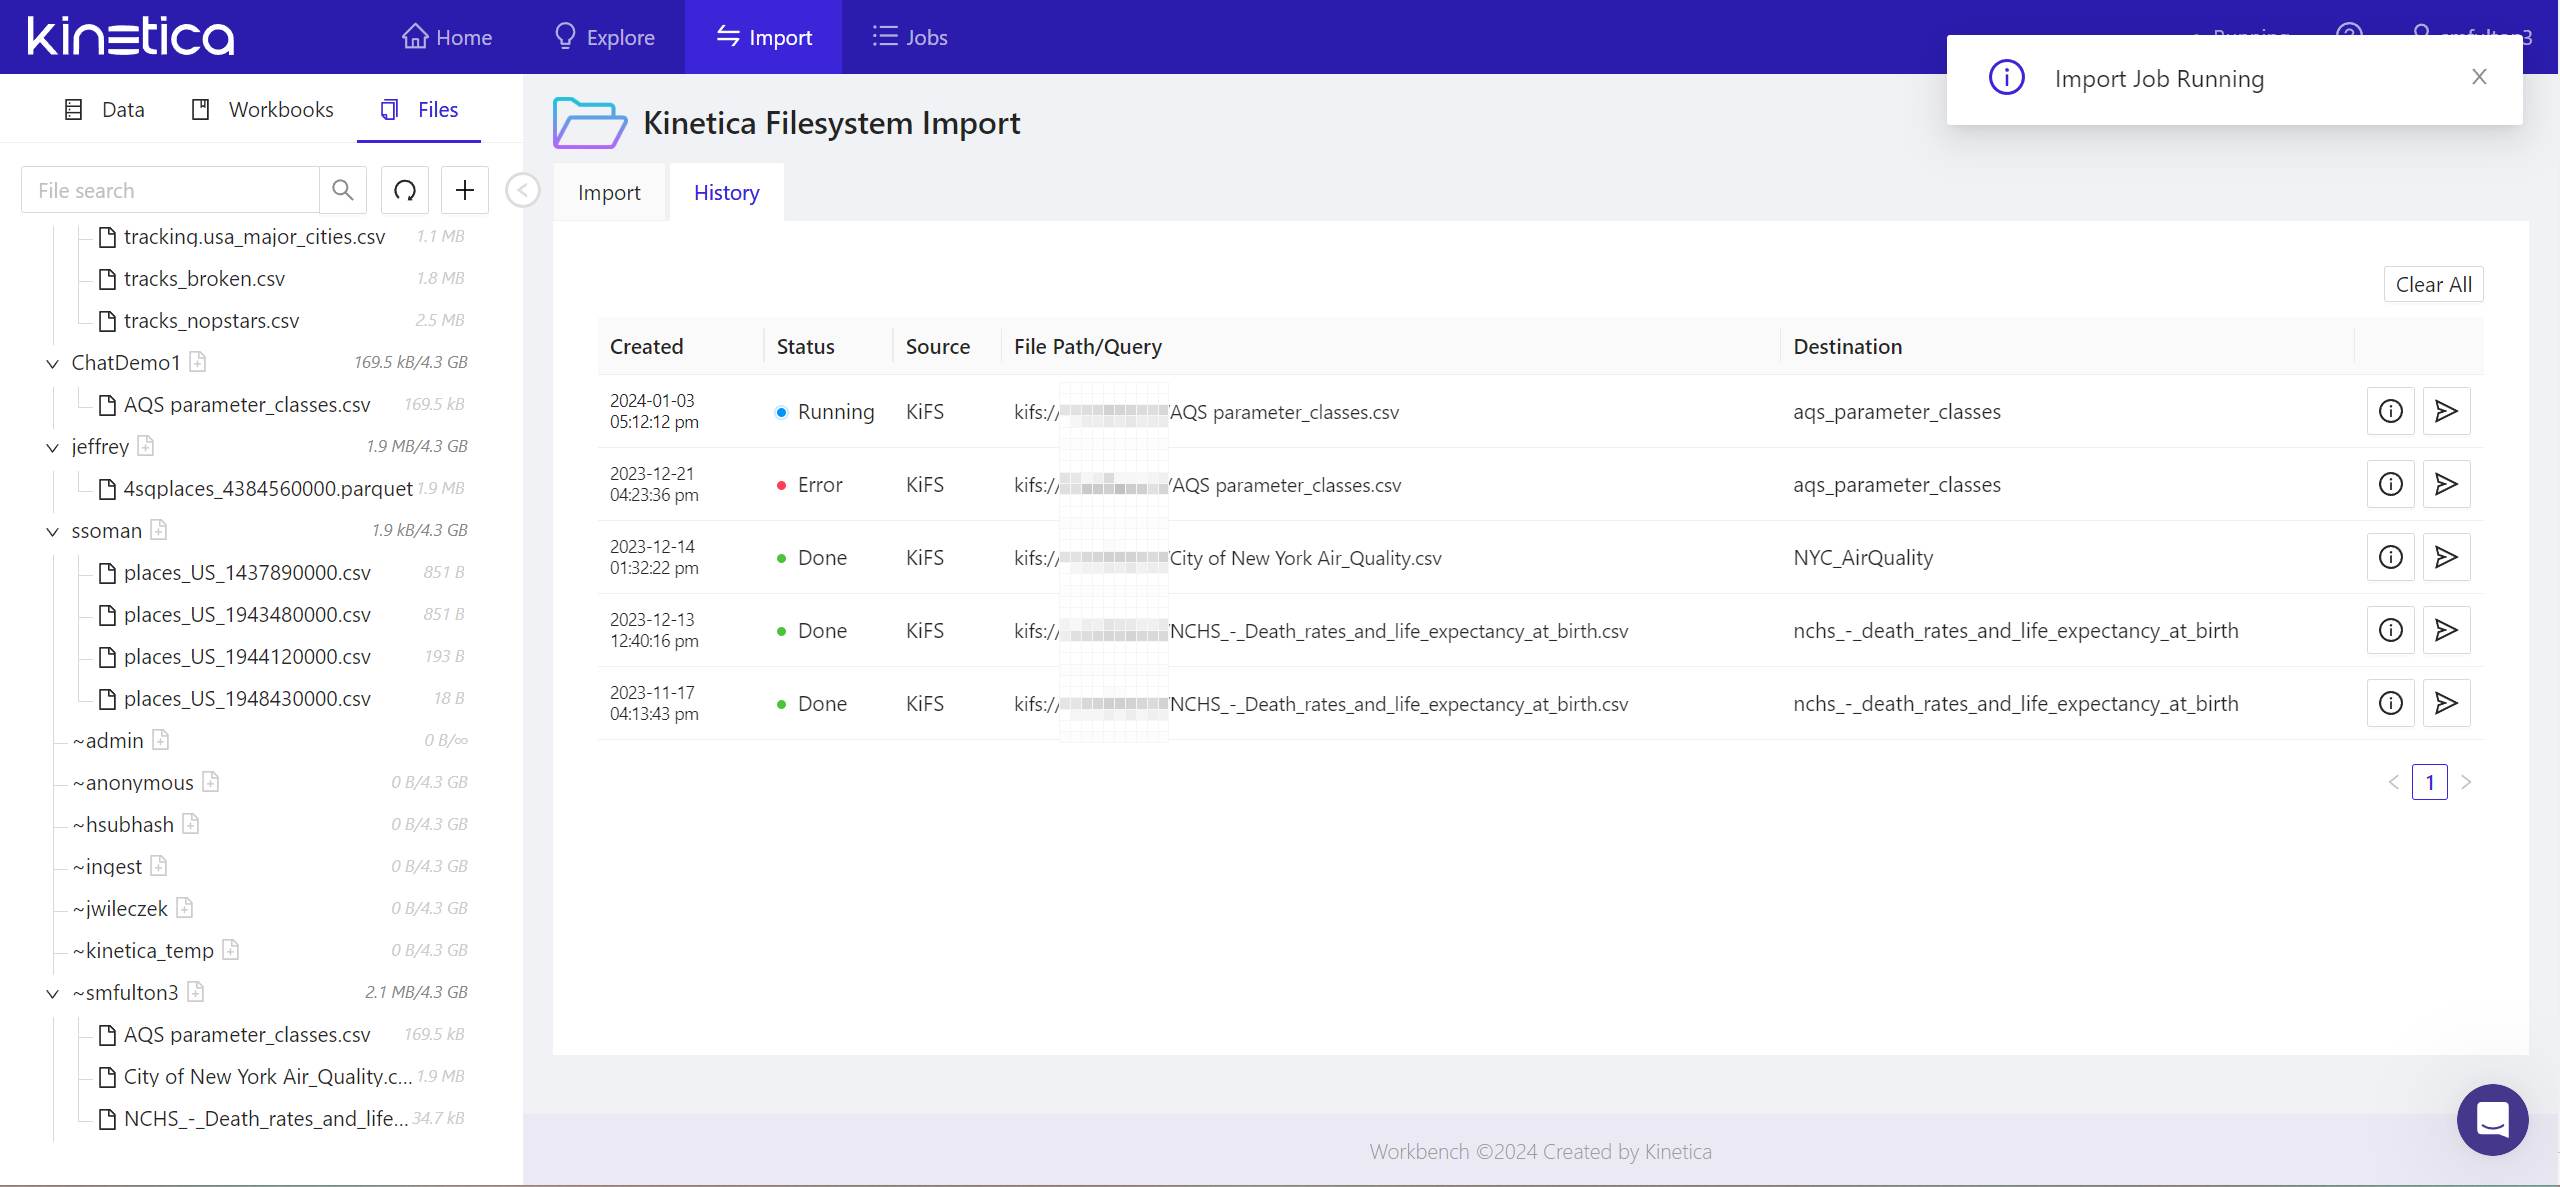
- The status of the import job will be tracked in the History tab. Once complete, you'll see a notification to that effect in the upper right of the panel.
Your imported files should now be accounted for in the Files tab of the Workbench's left-side pane. Look under your login name to locate them. The tables generated from that imported data should now appear in the Data tab of this same pane, in the subcategory Tables & Views, under the name of your schema.
STEP 2: Create Contexts for Imported Tables
With OpenAI's ChatGPT, you've probably experienced the feeling of getting a sub-par response from what you thought was an articulate question. Language models can't always infer the information you may have thought was obviously implied, if not explicitly asserted.
For SQL-GPT, you increase the probability of correlation between the generated SQL statements and the data you've just imported, by means of contexts. It's a tool designed to give the language model the best possible information on the first go.
A context consists of natural-language explanations of the terms relevant to your data, for the benefit of the language model. In Kinetica, a context is a native database object that is created using the SQL statement CREATE CONTEXT. Workbench enables you to develop a comprehensive context with the annotations and associations it needs to connect ideas from a natural-language question, with terms in your database.
There are four components of a complete context:
- Table definition The set of table definitions in a context indicate what tables should be considered when generating SQL responses. The DDL for these tables including the column definitions are sent to the LLM during inferencing. Tables with many columns can quickly consume LLM context space and this should be limited to only what is necessary. You can optionally provide the LLM with a description for the table which is usually a single sentence or a brief note explaining what the data represents in its entirety. For example, "The median annual death rates per capita for United States citizens."
- Rules – One or more instructions for the LLM regarding how to process or interpret data. For example, for geospatial data used in a Kinetica demo that includes the maps of the states, a rule may contain this instruction to apply a specific parameter: "Join this table using KI.FN.STXY_WITHIN()=1" The language model is capable of interpreting the sentence appropriately. Another example would advise the LLM to associate a field name airport_code with a phrase used to describe airports, such as "airport code" (without the underscore character) — as in, "Use airport_code to find the routing code for the airport."
- Column descriptions – Instructions helping the language model to interpret the meanings of field names, giving it clues for associating their symbols (which may have no language definition at all) with everyday terms and phrases that people generally use, coupled with terms that are specific to the data set. For example, in a data set that includes the perimeter points, or "fences," for given areas on a map, a good context may include a column named WKT. It's not obvious to a language model what that means, or that it's a common abbreviation for the geospatial abbreviation for Well-Known Text format. So a good column description might include, "A well-known text description of the spatial outline or perimeter of each fence."
-
Samples – An appropriate sample would include an example of a natural-language
question you would expect yourself or another user to ask, coupled with an actual Kinetica SQL
statement you've tried successfully in Kinetica. Samples should reference only the names of
tables that exist in the context. Otherwise, the LLM could generate queries that reference
non-existent tables and columns. You can add as many samples as you think may be
appropriate.
For one sample Kinetica compiled for a demo involving the locations of airports, engineers offered the question, "What is the centroid of DCA airport?" Here, "DCA" is the IATA location identifier for Reagan Airport in Washington, D.C. It isn't obvious that a database should retrieve DCA as an airport code first, so the sample provided offered a clue as to how to do this, using this correct response:
SELECT airport_centroid FROM llm_demo.airport_positions_v WHERE airport_code = "DCA";
This is a sample of a generated SQL statement that refers explicitly to Reagan Airport. It explicitly references the table name airport_positions_v and the field name airport_code, which would already be defined as database objects that exist within the environment. The LLM is capable of interpreting this instruction as a kind of template, creating a generalization that it can apply for situations where the questions being asked are not specifically about Reagan Airport, but some other airport.
Here's how to create a full context that refers to imported data:
-
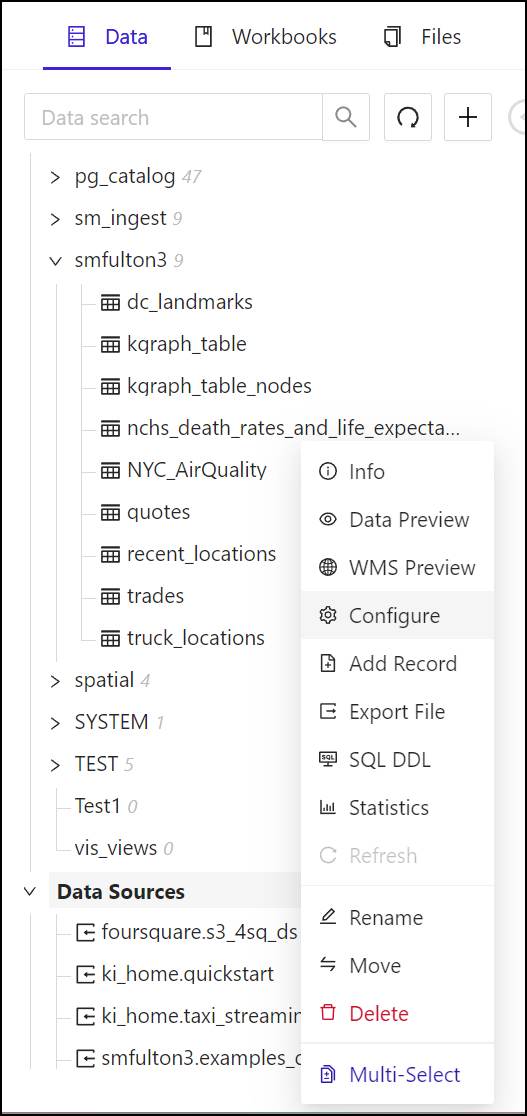
In Kinetica Workbench, from the left pane, click the Data tab. Then under the
Tables & Views category, right-click the name of the table or tables to which
the context will refer. From the popup menu, select Configure.
-
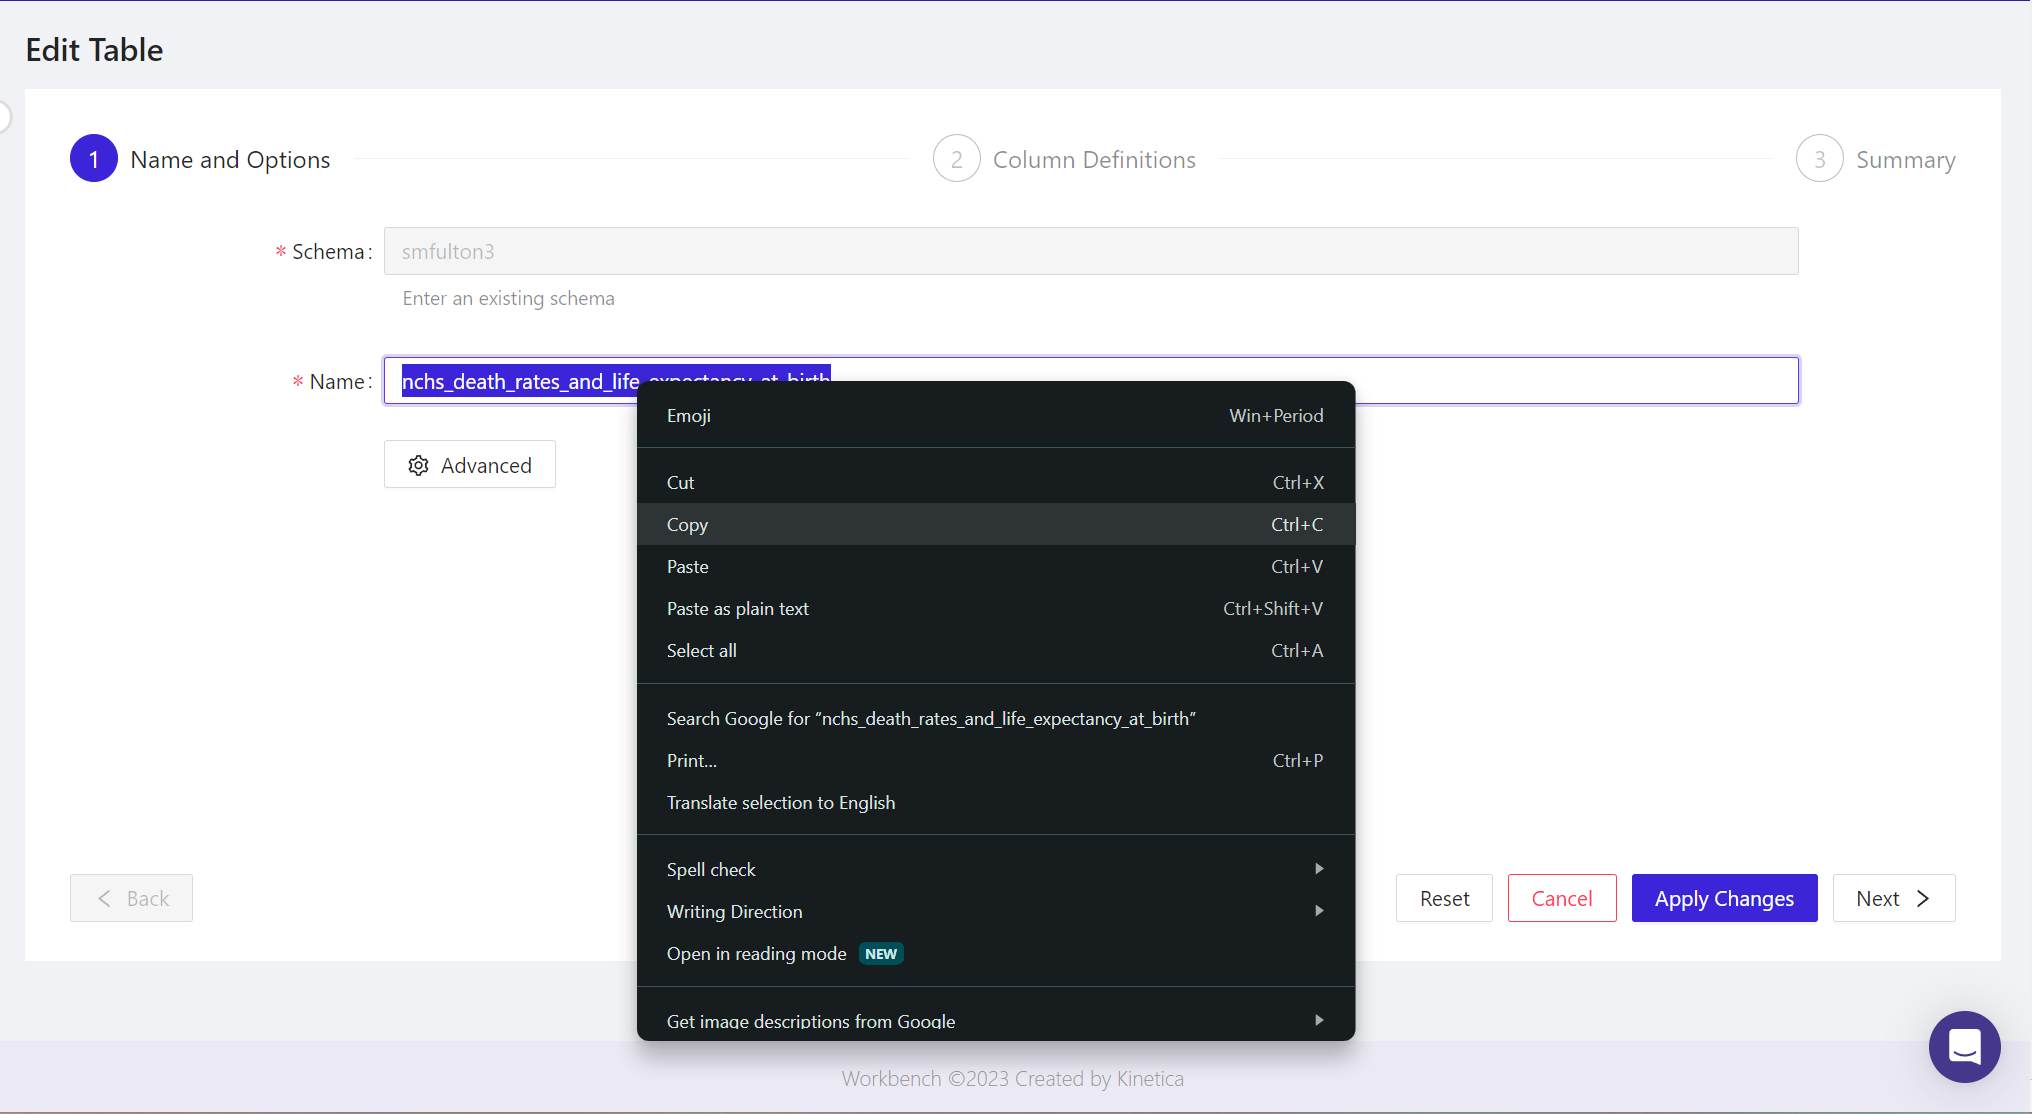
The Edit Table panel will appear.
-
In the Name field, highlight the complete table name, then in your browser,
right-click and from the popup, select Copy.
-
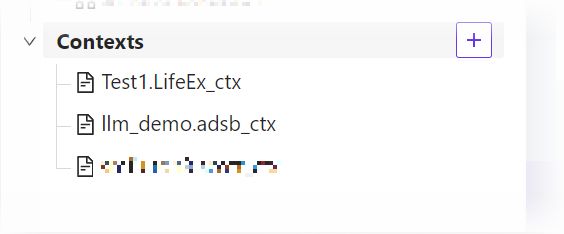
In the Data tab, at the bottom of the list of database objects, click the
+ button beside Contexts. The
Create Context panel will appear.
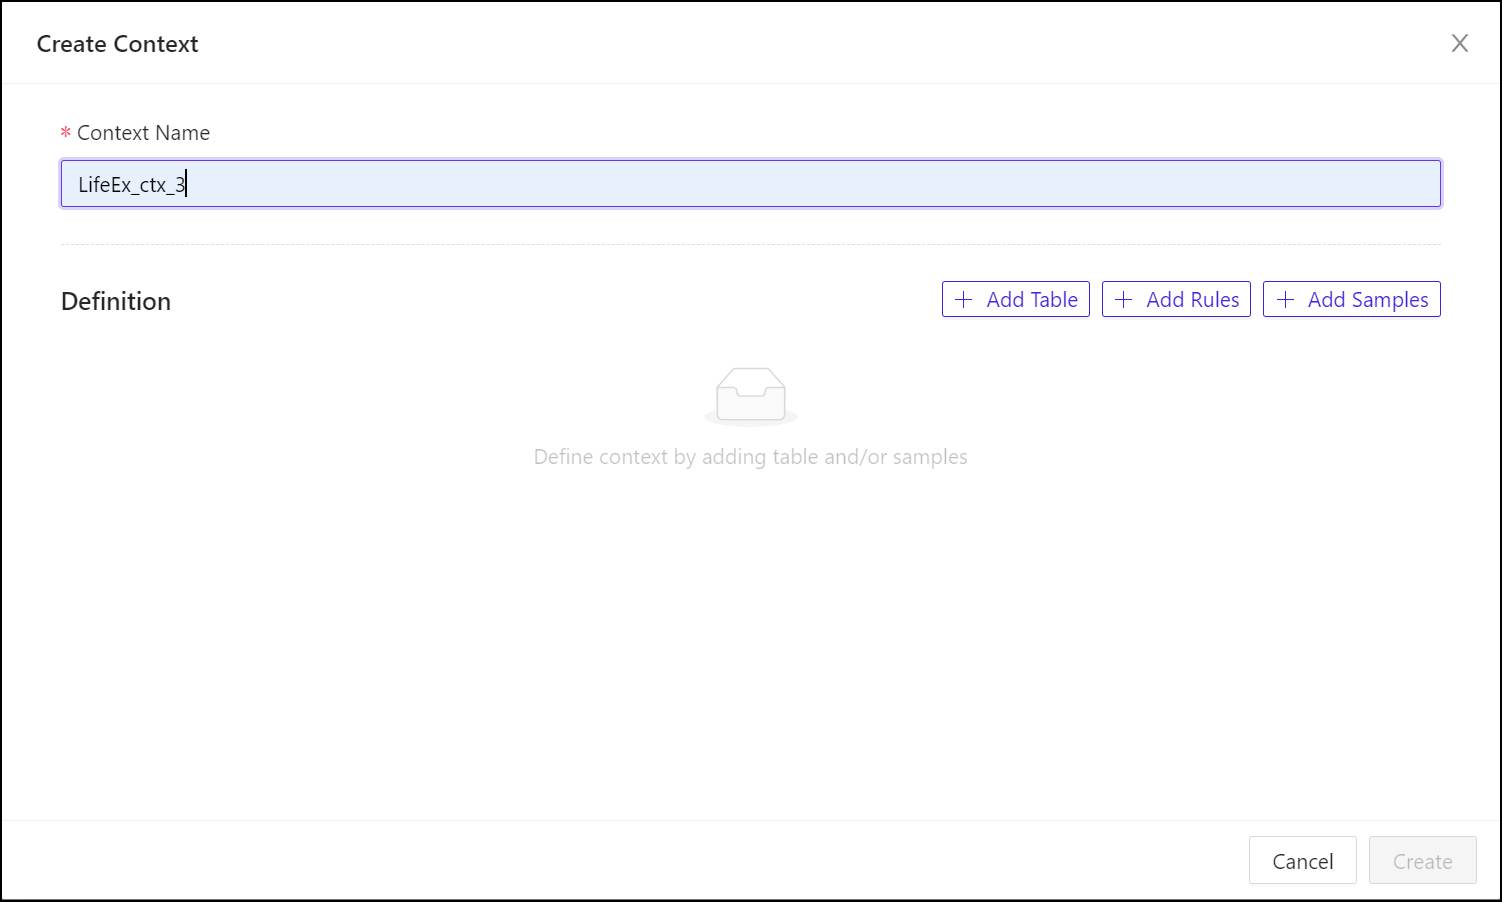
- In the Context Name field, enter a name for the context object in the database, using only letters, digits, and the underscore (_) character. This will be the name Kinetica will use to refer to the context.
-
A context may refer to more than one table in a schema and you should add each table that the LLM
should consider in responses. To begin associating a context with a table, click
+ Add Table.
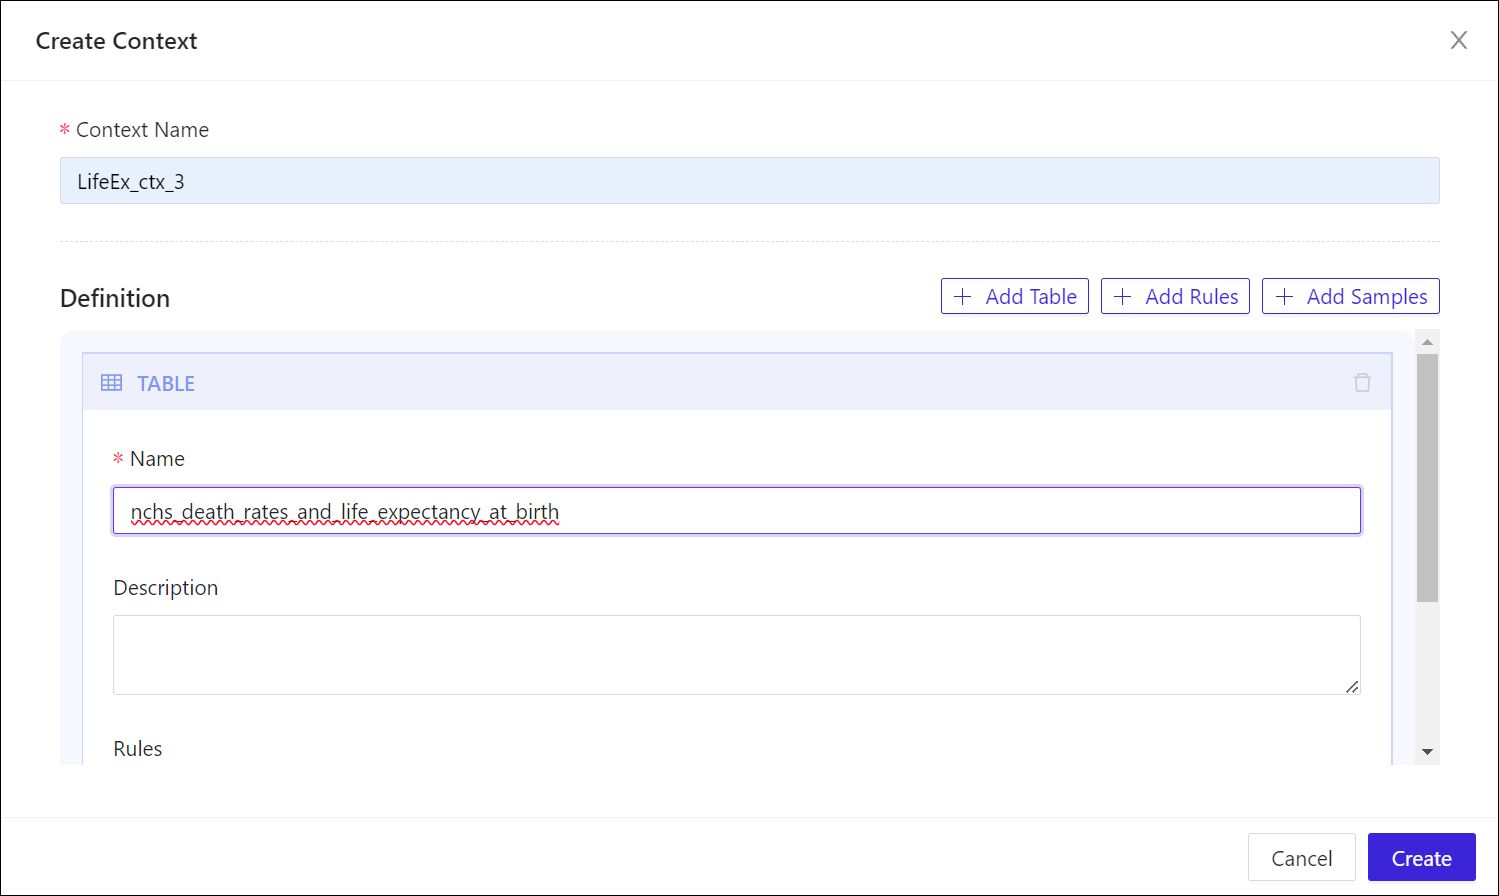
- In the Name field, enter or paste the name of the table you copied earlier.
-
Under Description, type a sentence or phrases that describes the data in this
table, making sure you use language and terminology that would likely be included in
natural-language questions that refer to this data.
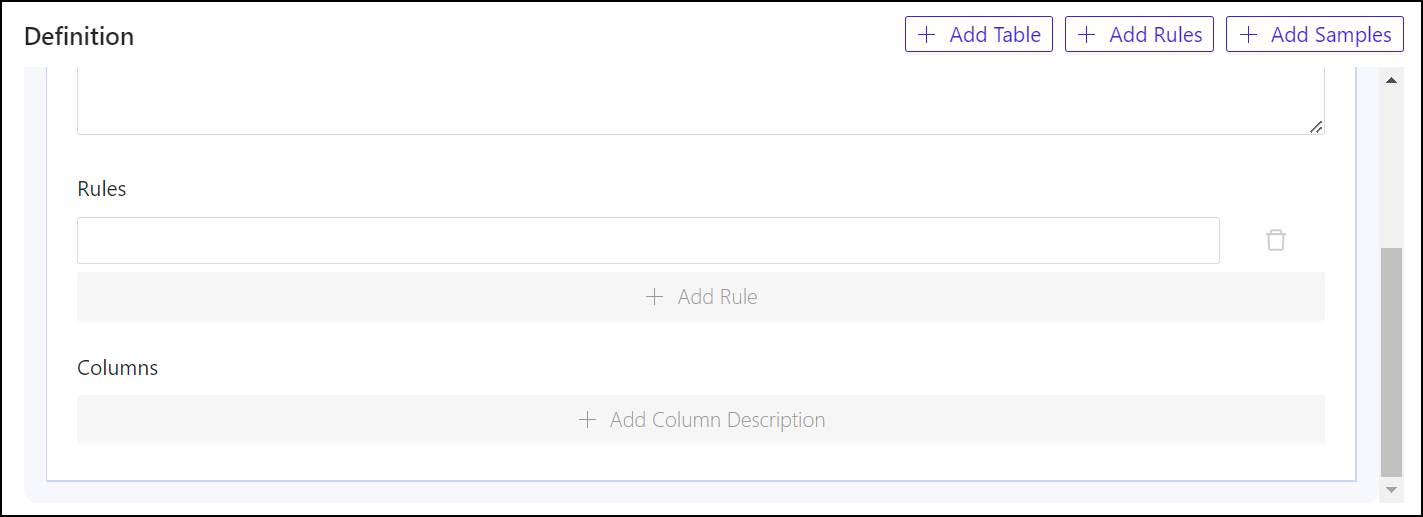
- Rules are optional within contexts, but very helpful. To add a rule that applies to a table, under Rules, click + Add Rule (you may need to scroll down) then enter the rule into the field that appears above the button.
- Column descriptions are also optional, although they're frequently necessary to give the language model enough synonyms and associated terms to deduce references to these columns from regular phrases. To add a column description for a column, click + Add Column Description. In the Name field, enter the exact field name for the column you wish to describe. Then under Description, enter a phrase that includes terms and words that are synonymous with that field name, and that would describe it adequately for a human user. Repeat this process for as many columns as may require descriptions.
- To add a rule that applies to the context or the schema as a whole, from the top of the Create Context panel, click + Add Rules. This opens up a Rules box toward the bottom of the set (you may need to scroll down to see it). To add the first rule, click + Add Rule, then enter the general rule into the field that appears above the button. Repeat for as many rules as your schema may require.
- To add one or more sample pairs, from the top of the Create Context panel, click + Add Samples. A box marked Samples will appear below the Rules box you opened earlier. To add the first sample in the set, click + Add Sample. Then under Question, enter a natural-language question you believe a regular user would pose. Under Answer, enter the SQL code that you know would yield the results that would satisfy this question. (You may wish to open a separate Kinetica workbook, to try SQL statements yourself until you get the results you're looking for, then use the best statement as your answer for the sample.) Repeat for as many samples as you believe would best benefit your context.
- When you have populated the context components with enough clues, instructions, and samples, click Create. Kinetica will process your instructions as context creation statements, and will soon inform you of its results.
STEP 3: Ask SQL-GPT Questions
Now let's test Kinetica's SQL generation processes at work. Here, you'll be creating a workbook in Kinetica Workbench that accepts your natural-language questions, and produces SQL statements you should be able to use in the Kinetica database. Here's how to begin a new workbook:
-
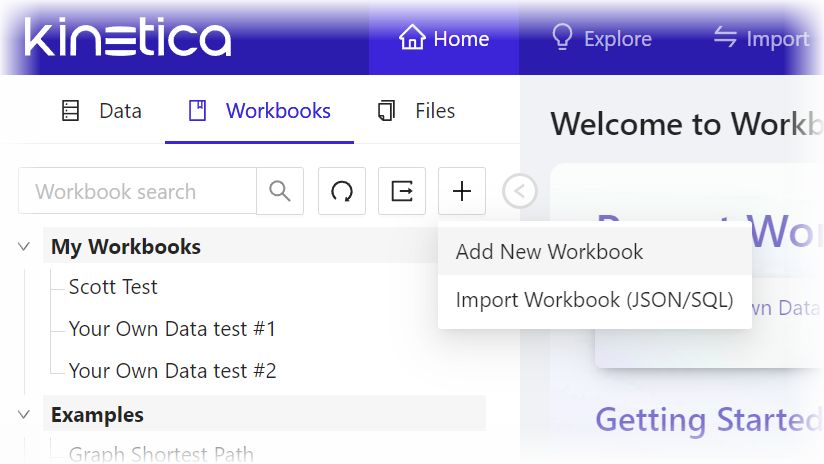
From the left pane of Kinetica Workbench, click Workbooks.
-
From the Workbooks tab, point to the + button and from the
dropdown, select Add New Workbook. The Create Workbook panel
will appear.
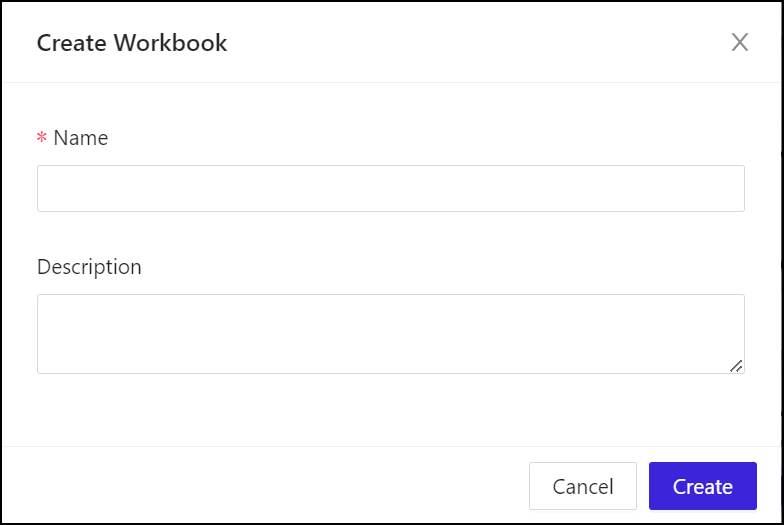
- Under Name, enter a unique name for the workbook. This is not a database object, so it can have special characters, distinguished upper and lower case, and spaces.
- Under Description, enter something that describes the purposes of the workbook for your purposes. This is not a description for a language model or for generative AI training; it's just for you.
-
Click Create to generate the workbook. It will soon appear in the Workbench
window, and the first worksheet, named Sheet 1, will already have been
generated.
-
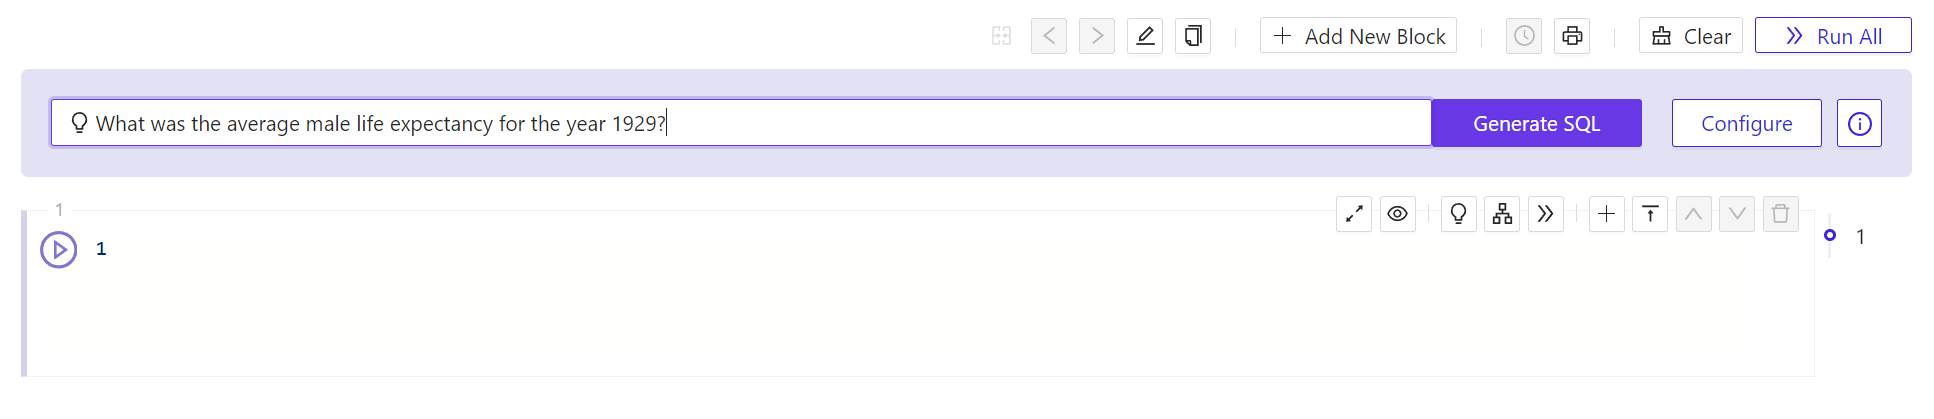
In the field at the top of the panel marked with a light bulb, enter a natural-language question to
which you'd like the database to be able to respond. You don't need to include any extra
syntax, such as quotation marks or SQL reserved words. Just type a question as though you were
entering it into an AI chat window, then click Generate SQL. The Workbench
will respond with a warning and the Context Configuration panel.
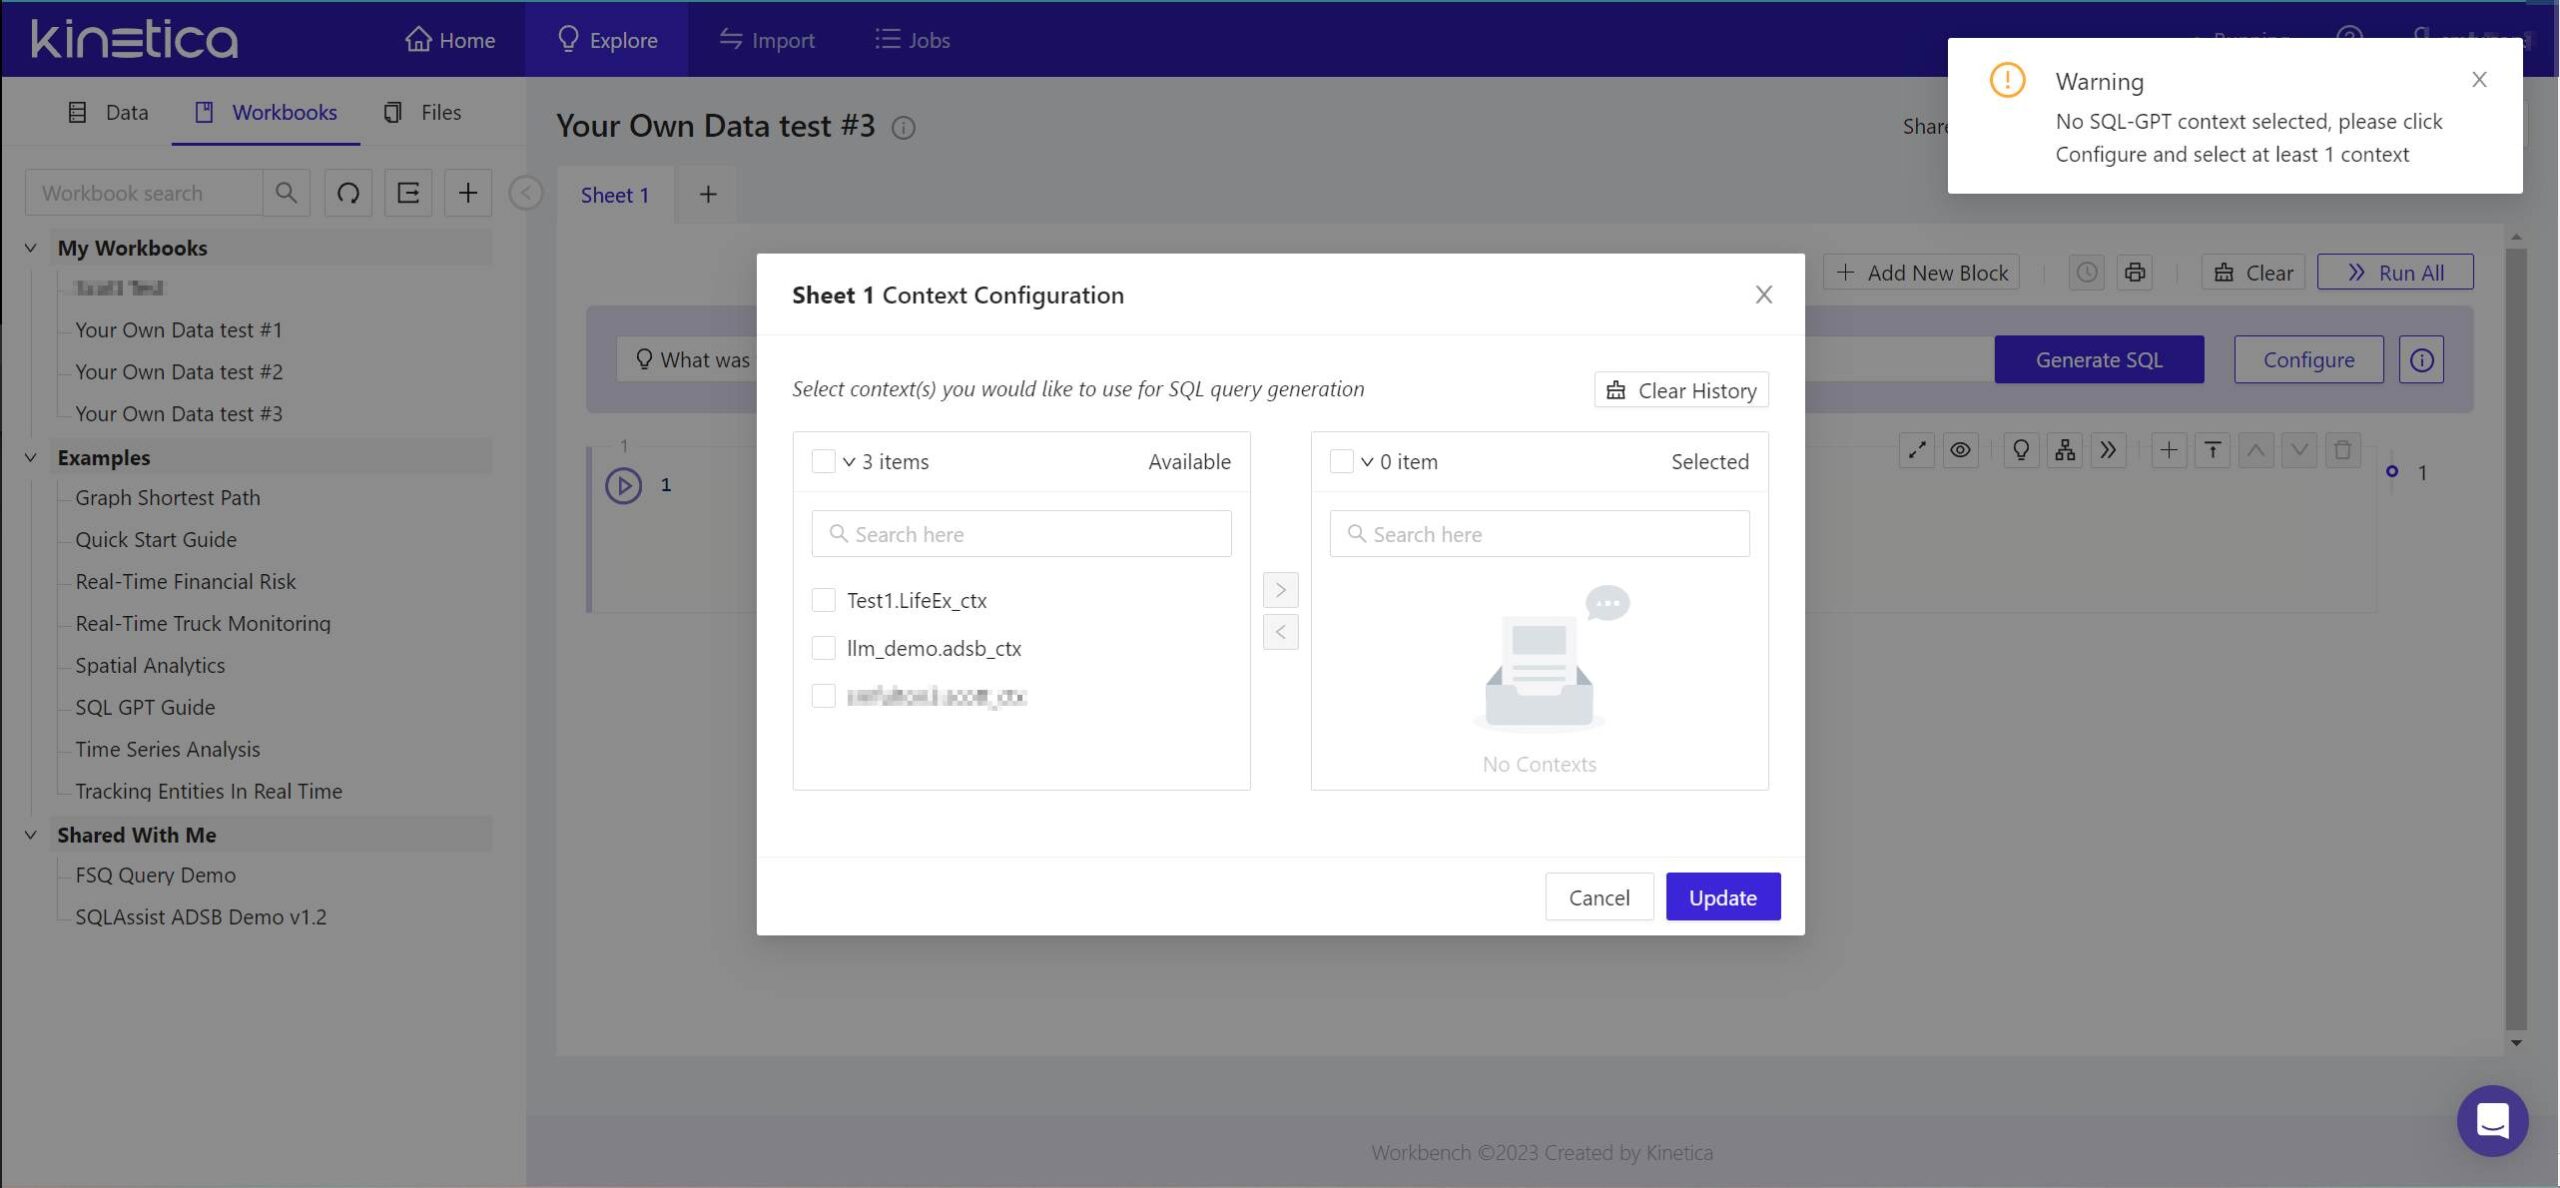
- The warning you will see indicates that Kinetica has not yet attached a context to the question you've posed. From the panel that appears, in the left-side list, check the box beside the name of the context you created earlier. Then click the > button so that it appears in the right-side list. Then click Update.
-
After the panel disappears, click Generate SQL again. In a few moments,
Kinetica will respond with a SQL statement. Its first line will be a comment containing the
text of the question you posed.
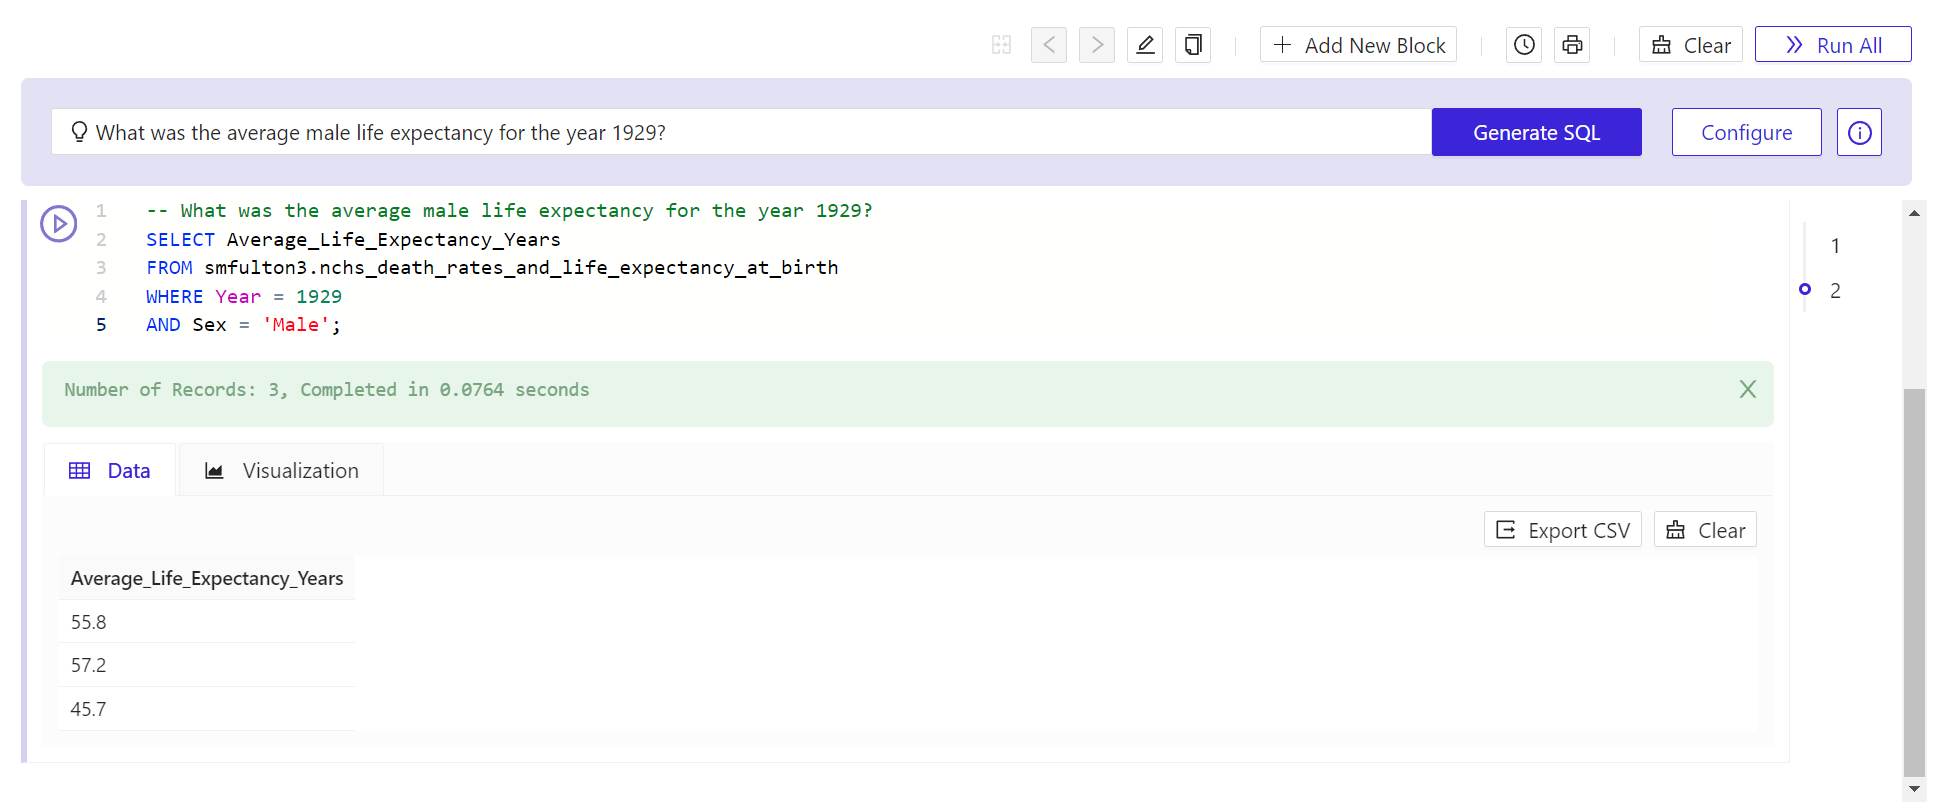
- To test this query on the data you've generated is to click the round > (Play) button to the upper left of the new query. In a very brief moment, Kinetica should respond with a view of data queried from the table or tables you imported.
It's fair to say at this point, especially at the first go, that Kinetica may respond with something else: perhaps an error, or maybe data that does not actually resolve the criteria. Artificially intelligent inferencing is not a perfect process. However, you can improve the efficiency of the results by adding information to your context and trying again. It may take a few runs to get the correct results. Keep in mind, as you're doing this, that the minutes you're spending improving the language model's ability to ascertain what your language is trying to say, equate to days and even weeks of work in a conventional ETL project, where engineers work to make databases more responsive to dashboards and ad-hoc queries in real time.